Followers

Sunday 13 October 2019

Missha M Perfect Cover BB Cream First Impression + Wear Test

Hey gorgeous, welcome back to my blog!

I've recently saw some Youtuber raving about the Missha M Perfect Cover BB Cream and how this is her holy grail so I've decided to give it a try! So if you are curious to see how this BB cream works on me, keep on reading!


The Missha M Perfect Cover BB Cream claims to offer a novel skincare concept with BB Cream, which lightens skin tone by healing visible wrinkles and blemishes with excellent skin cover ability and prevents skin aging through effective whitening and anti wrinkle properties.


I like that the BB Cream comes in a tube with a pump but when you first use it, you got to pump a few times before product comes out as I think the tube is half filled with air.

I got mine in the shade #21 as this is my usual shade when it comes to Korean Beauty product and it suits me perfectly. The texture of this BB cream is very creamy and easy to apply.

Used a makeup sponge to apply the BB Cream on the right side of my face
Using just my finger to apply the BB Cream on the left side of my face 
This Missha BB Cream has a medium coverage and it is definitely buildable. I personally prefer applying the makeup with just my finger because I think the coverage is slightly higher when I do so as compared to when I applied it with a makeup sponge. One thing I don't quite like is that the BB Cream tends to set into my fine lines, especially under the eye. I like that it has a natural yet dewy finish and it gives off a subtle glow. Much to my surprise, even though the finish is slightly dewy, the BB Cream manages to control oil pretty well and my face remains shine free at the t-zone area the whole day.

After 10 hours of wearing the BB Cream 

Overall I am really impressed with this Missha M Perfect Cover BB Cream because I feel like it can be a good everyday foundation which gives the My Skin But Better vibe. The coverage is pretty decent as its name suggested and it is definitely buildable. Also, it is suitable for every skin types in my opinion so if you have got oily skin like me, don't be afraid of its dewyness when you first applied it because it will not get any more dewy through the day. A thumbs up from me for this Missha M Perfect Cover BB Cream!

And that's all I have for this post. Let me know if there's any foundation reviews you would like to see and I'll be happy to do it! Please follow me if you haven't already and I'll see you in my next post, xoxo.


Wednesday 9 October 2019

Full Face of Wet N Wild Cosmetics

Hey gorgeous, welcome back to my blog!

In today's post, I'm gonna share a full face makeup with only Wet N Wild Cosmetics products. Wet N Wild is a very affordable drugstore brand and you can actually get their products in some of the Watsons' outlets or their atrium sale and to be honest, I think most of their products are really good and definitely do not disappoint. So if you are keen to see what are the products I'm using as well as how my completed makeup look looks like, keep on reading!

To prep the face, I am going with the Photo focus Face Primer in Matte Mat because your girl here has got oily skin.


The primer comes in a squeezing tube and it is very light and travel friendly. The texture of the primer itself if lotion like and it absorbs into the skin really quickly, leaving a matte and smooth finish. It also feels really lightweight on the skin and my face looks instantly shine-free. I feel that this is a good and affordable primer for oily skin.

Moving on to foundation, I am using one of my favourite drugstore foundation and that is the Photofocus Foundation.


This foundation comes in a glass bottle with a spatula-like wand, which in my opinion is a little unhygienic because most of the time the wand will be in direct contact with the skin and then you got to dip it back into the bottle, contaminating the product inside. Also, the foundation has a very strong paint smell which may be unacceptable to some people but because I really like the finish of the foundation, I sorta force myself to ignore the smell and it does get better after awhile.

Left face done with the foundation. 
I got my foundation in the shade Rose Ivory, which is the 5th lightest shade and it has a pinkish undertone to it. The foundation claims to be high-performing, skin-perfecting which underwent major road testing under seven different photo lighting conditions to deliver flawless camera-ready makeup every time. It is specially made with a matte, light-diffusing complex to give your skin #nofilter perfection. What I like about this foundation is that it is lightweight and very blendable. I would say it also has a medium and buildable coverage and the finish is very natural, almost skin like in my opinion. It is not drying and it definitely allows me to stay shine free throughout the day. So for this foundation, I feel that it is suitable for all skin types and it is only retailing at $13.90 in Watsons, so why not give it a try.

For concealer, I'm also going for the one in their Photofocus line.


Mine is in the shade light ivory and it is the perfect shade to cover the dark eye circles.


I like that it comes with a doe foot applicator and the texture is very creamy and blendable. But on the other hand, I feel that this concealer tends to dry up faster as compared to my other drugstore concealers and it does set into my fine lines so I am not exactly a fan of this concealer.

To set the undereye, I am using the Color Icon Bronzer in Reserve Your Cabana, and this is my holy grail undereye setting powder but I heard it is discontinued already?! Why Wet N Wild!!


I love the soft finish of this powder, especially under the eyes because it seems to blur my fine lines and at the same time brighten it as well, giving it a slight sheen. I like how it makes me look more energetic.

And as for the full face setting powder, I'm using the Photofocus Pressed Powder in Neutral Beige.


The texture of this powder is soft and silky and I'm loving the soft, satin finish of the setting powder. Most importantly, it helps to control shine throughout the day without any cakeyness. This pressed powder is definitely not drying so I think it will suit all skin types.

And the base makeup is completed. Since I'm using mostly the photofocus line products, let's see if they can pass the flashback test.


I think they fare pretty well, no white cast on my face 👍

Next up, to contour the face, I'm using the Megaglo Contouring Palette Contour in the shade Dulce De Leche with the limited edition Blush brush.


The powder is finely milled and it doesn't cause any fallout. It is also very blendable and buildable. However I find that the contour is too warm toned and orangey for my skin tone and the highlight in this palette doesn't impress me at all because Wet N Wild has many other good highlight products that are way glowier than this.

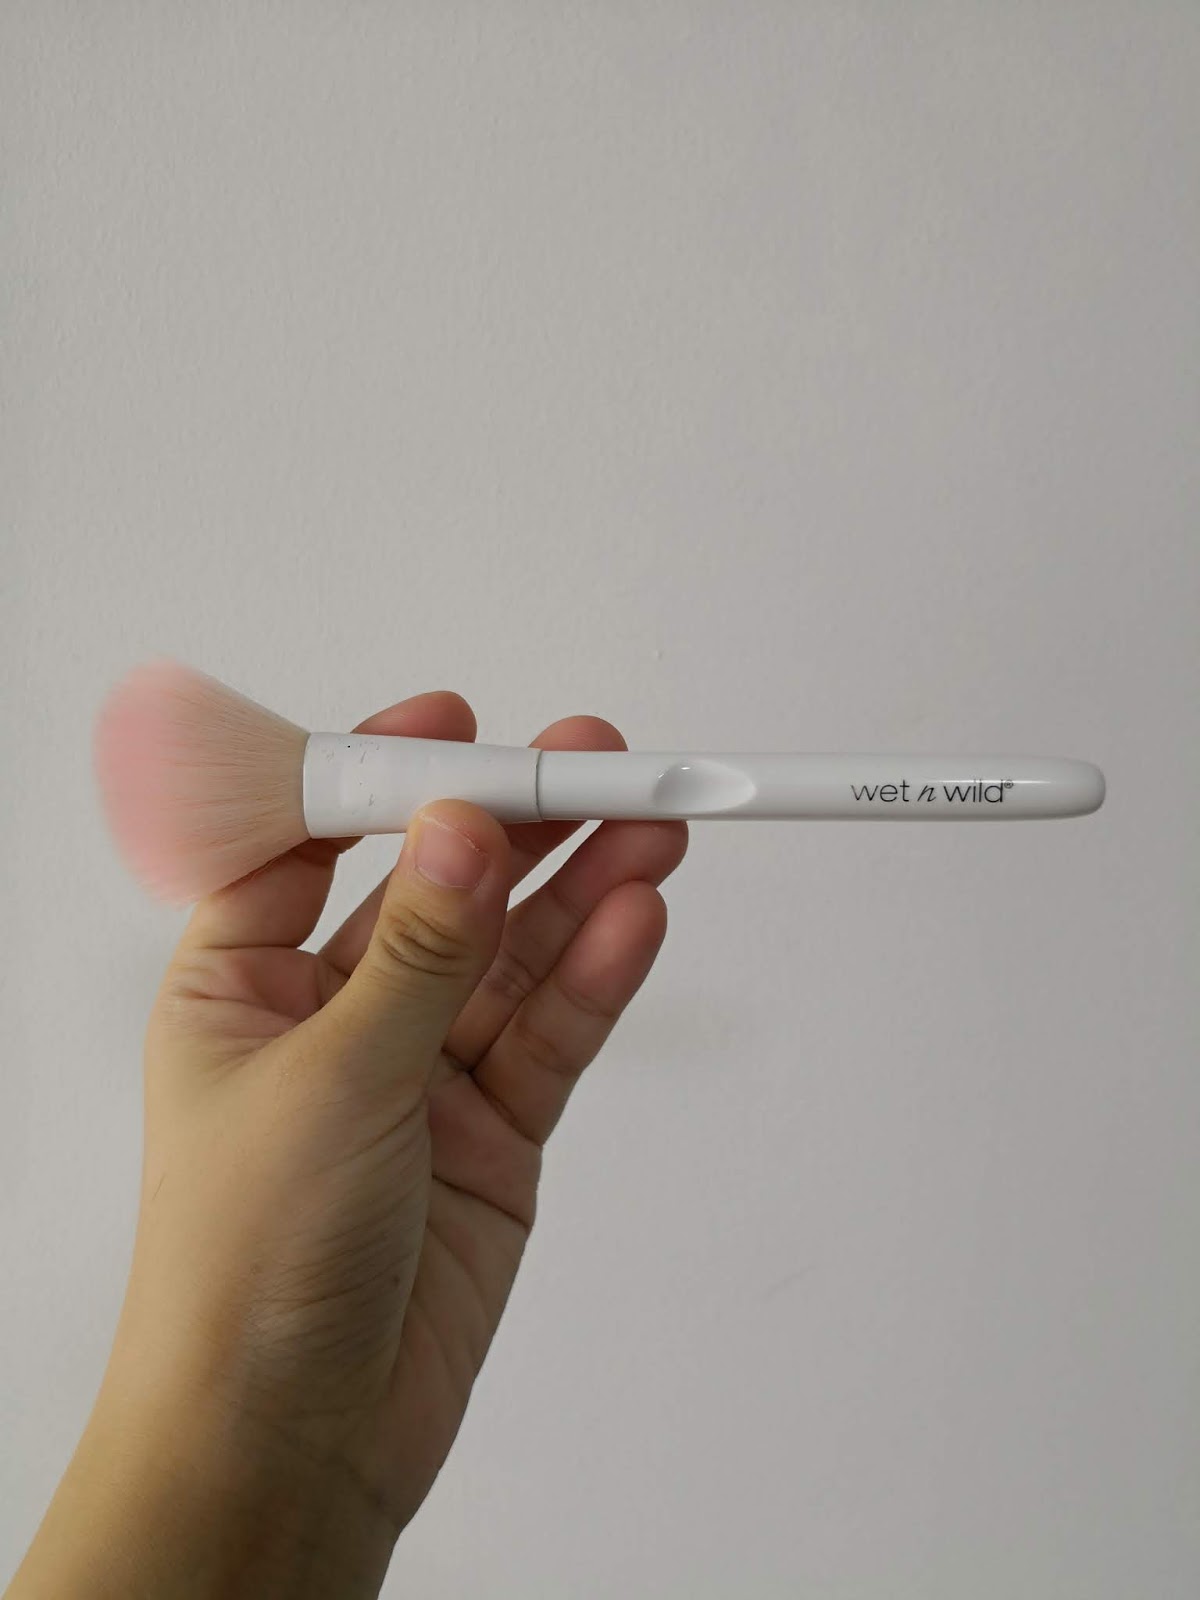
For blusher, I'm using the coloricon Blush in Mellow Wine which is a moderately warm toned, medium dark coral shade that comes with a matte finish. To apply the Blusher, I'm using the Wet N Wild Blush Brush which is one of my favourite blush brush and I believe I've got few of the same brush in my collection. Wet n Wild brushes are really inexpensive and I really like their colour combination of pink and white.


Anyway back to the blusher, I really like this Mellow Wine Blush because it is very pigmented and easy to apply due to its smooth texture. It is also very blendable and you can easily build it up to the intensity you like. I also like that it has a very natural finish and it can last a whole day without any touch up. I believe this blusher is retailing at less than $10 which I think is super affordable and you get yourself a big pan too.

Moving on to the highlight, I'm going with the Megaglo Highlighting Powder which I totally swear by. These highlighting powders have got the silky smooth texture which makes them so easy to blend. A little goes a long way for these highlight powders and just one swipe will make you shine like a glazed donut.


For today's makeup look, I'm going for the one in shade Precious Petals which is a champagne gold shade and I think it gives off the right amount of shimmer and glow. I'm also using the Wet n Wild Small Stipple brush here to do the highlight. Anyway, for just $16.90, I think this is a highlighting powder that everyone should try out.

Finally for the eye make up, I'm using the Au Naturel eyeshadow palette in Nude Awakening. It consists of both shimmer and matte shades which makes it more versatile when creating eye looks. The eyeshadows are very pigmented with very minimal fallouts. But if i have to be completely honest, I don't see myself reaching out to this palette because there is no particular shade in this palette that stands out. The colours in this palette are very common and I feel that I can similar shades in some other palettes.


Completed eye look, nothing fanciful here. 

To set the whole makeup, I am gonna use the Photofocus Natural Finish Setting Spray.


I like that it comes in such a small, cute bottle which makes it so easy to carry around but the smell of this setting spray is so terrible and the smell lingered on for quite awhile. Because of the smell, I'm gonna give this setting spray a huge ❌.

Lastly for the lips, I'm going for the Wet N Wild lipstick in Blushing Bali. I can't remember the name of the lipstick but I did do a lip swatch of these lippies few months back so if you are keen, you can check out the previous post that I did.


For just $2.90, I think this lipstick is pretty decent as it gives a satin finish and it is not drying to the lips at all. The colour doesn't really last but I'm totally fine with that.

Full Face Makeup Completed
So that's all I have for this post! Let me know which other brands you would like to see me doing for a full face makeup look. Please follow me if you haven't already and I'll see you in my next post, xoxo.

Monday 7 October 2019

What's Really Useful In My Hospital Bag

Hey gorgeous, welcome back to my blog!

In today's post, I'll be sharing an updated post on what's really useful in my hospital bag which I had previously shared. If you have been following me on my social media, then this should not be news to you that I am officially a mother as of 1st Oct 2019! So if you are a mother-to-be and wanna know what I think you really need to bring to the hospital, keep on reading.

If you have already read my previous post on what's in my hospital bag, you know that I've actually packed many extra things that I thought I may need, just in case. And honestly, I didn't use some of the items I brought to the hospital, so to save some hassle, I will list the items I think you really need to bring and you are good to go.

1) Breast Pump

Even though my Spectra S1+ breast pump is really heavy and bulky, I had absolutely no regret bringing it to the hospital. The hospital that you are going to will usually arrange a lactation consultant to visit you in your ward during your stay so that he/she can guide you while you breast feed. And I took the opportunity to learn how to latch my baby well as well as how to use the breast pump effectively. I feel that to be able to learn it hands on is much more useful than just reading the manual and trying to grasp whatever you can on your own. So I think it is necessary to bring your own breast pump to the hospital. In fact you should start using it to stimulate breast milk.

2) Disposable Underwear

This is definitely a must for convenience sake and hygiene purpose. Most mommies will experience vaginal postpartum bleeding which is the heavy flow of blood after delivery and it will usually last up to 10 days. Bringing disposal underwear will save you the hassle to wash more dirty laundry when you are discharged from the hospital.

3) Pureen Maternity Pads

The same reason why you should bring disposable underwear and if you have forgotten to bring it, the hospital will provide you with what they have and charge it to your bill accordingly. On the first day of my hospital stay, I had to use the one that the hospital provided as I was unable to move on my own, let alone changed my own pad.


The pad that the hospital provided was the loop kind so it was easier for the nurses to help change the pad. If you can, try to bring two different style of maternity pads and you are good to go.

4) Baby Wipes/Body Wipes

I was very glad I put in a packet of baby wipes in the last second as it turned out to be the best decision ever. During the hospital stay, I was not able to bathe at all so I had to turn to the baby wipes to keep myself clean and hygiene (sort of). I especially love to use the baby wipes on my face as I knew it's chemical free and definitely safe and harmless to the skin.

5) Nipple Cream, nipple shield

These in my opinion were the most important things in my bag and I believe all new mothers will need them for their hospital stay. When your newborn first try to feed on your breast milk, he or she does not know how to and before you know it, your nipples are all swollen and painful from all the sucking. What I did to reduce the pain was to first clean the breast with a baby wipe before spamming nipple cream. Lastly, to protect the nipples from friction against your clothes, put on the shield. By doing so, you can also ensure the nipple cream stay in place.

6) Going Home Clothes and just ONE maternity bra

If you have read my previous post, I actually packed in my own pyjamas and guess what, totally unnecessary. I was given new set of breast feeding gown on a daily basis and gown itself was so convenient, I didn't have to change to my own pyjamas at all. And there wasn't a need to put on your maternity bra since you will be feeding on a regular basis. So my suggestion is, just bring a set of going home clothes (preferably breast feeding friendly) and a maternity bra and you are all set and ready to go.

All in all, I am very thankful for a pleasant hospital stay and most importantly, a very supportive husband. While I was busy trying to recover from the surgery and breast feeding, the husband was the one who handled everything else. He was the one burping the baby for the first time, swaddling her up when I couldn't do it myself, helped me washed up and encouraged me when I didn't have any breast milk during the first two days. So husbands and fathers to be, don't be stingy in your encouraging words because they may make a whole lot of difference to the mommies and you are indeed the best support the mommies can ever have.

Yupps so that's all I have to update in this post. I hope it is kinda useful to mommies to be out there. Please follow me if you haven't already and I'll see you in my next post, xoxo.

Thursday 3 October 2019

September 2019 Favourites

Hey gorgeous, welcome back to my blog!

I know I've been saying this for all my monthly favourite post but yupps can't believe it's already October and I had recently just given birth to my daughter Renée on 1st Oct 2019. So this is my very first post after I became a mom and I'm gonna share with you what I've been loving in the month of September. If you are keen to see what are the products I've been using for the past one month, keep on reading!

1) Hourglass Vanish Seamless Finish Foundation Stick


I've a new foundation favourite for the month of September and I found myself reaching out for it on a daily basis, other than on the days I was testing new foundations obviously and my new foundation favourite is the Hourglass Vanish Seamless Finish Foundation Stick. To be honest, I was never a fan of foundation stick before I found this Hourglass one as I thought their coverage and finishing is not my cup of tea. I used to think that foundation sticks will make my face a tad greasy and since I've oily skin, I tend to avoid using stick foundation. But the Hourglass one really took me by surprise. Not only is it not greasy at all, the finishing of the foundation is so natural and it makes my face looks so flawless. It literally lasts a whole day on the skin without any cakeyness or any wear off and my face just looks perfect though the day. I've actually done a first impression and wear test review on it few weeks ago so if you are interested, you may want to read that post too but yes the Hourglass Vanish Seamless Finish Foundation Stick is my new holy grail for stick foundation and I absolutely love it. Oh right and in case you want to know, I'm in shade Vanilla and it suits my skin tone perfectly. You don't have to get a shade lighter because this foundation does not oxidise at all.

2) L'Oréal Infallible Makeup Extender Setting Spray


If you've been following me long enough, you will know that my holy grail setting spray has always been the Urban Decay All Nighter spray and I still stand by it. Whenever there is a Sephora Sale, I will find myself stocking the Urban Decay setting spray up but I think i may have found myself a drugstore dupe for that and it is the L'Oréal Infallible Makeup Extender Setting Spray. I love how it is what it claims, makeup extender and my makeup literally lasts a whole day whenever I use the spray. And I don't mean just the foundation, even my blusher, bronzer and highlight stays put the entire day. It also helps to keep my face looking matte the entire day, which is right up my alley since I have oily skin. And guess what, I think it smells a lot like the Urban Decay All Nighter setting spray as well (the saliva smell) and I actually quite like it haha.

3) MAC Love Me Lipstick in Bated Breath


My last makeup favourite of the month is this Mac Cosmetics Love Me Lipsticks in the shade Bated Breath. I love that this lipstick is super moisturising to the lips, very light weight yet pigmented and it gives a very soft satin finish. Most importantly, it does not feel dry on my lips. Bated breath is a warm tone, dark plum shade which I think is very suitable for autumn so I can totally see myself wearing it for this season. Really loving the formula of this lipstick and I can't wait to try out the other shades as well.

4) Farmarcy Green Clean Makeup Melt away Cleansing Balm


Moving on to my skin care favourites of the month, the first on my list is the Farmacy Green Clean Makeup Meltaway Cleansing Balm. Okay this makeup remover is not very cheap, it is retailing at $50 in Sephora and I bought it during the September Sephora Sale. This cleansing balm contains sunflower oil and ginger root oil to gently cleanse and nourish the skin for a glowing complexion. With the extract of moringa tree, it helps to purify and refresh skin while papaya extract acts as a natural exfoliator to help refine skin's surface. With these ingredients, this cleansing balm not only works as a makeup remover, it also double up as a skin care product. A little goes a very long way for this cleansing balm and all I ever need is a ten cent coin amount to remove a full face makeup. What really impresses me is that it can even remove waterproof mascara which I usually have trouble removing it with just remover wipes or micellar water.


And I also like that it does not feel greasy on the skin. In fact, it is really gentle and light weight on the face and I like its natural, herb-ish smell.

5) Fresh Rose Deep Hydration Facial Toner (100ml)


For the month of September, I've been trying out a few new skincare products and one of it is the Fresh Rose Deep Hydration Facial Toner. It is a gentle toner infused with real rose petals and it claims to soften the skin and refines the appearance of pores for a healthy looking complexion. Since this is the first time I'm trying the toner, I went for the smaller bottle in 100ml first and it is retailing at $38 whereas the big bottle in 250ml is retailing at $65. If you do the math, it is indeed cheaper to get the big bottle but if you are new to this toner and would like to test it out first, then i think it's a good idea to go for the smaller bottle first. A little goes a very long way for this toner and I believe the 100ml can last you at least half a year. I really like the packaging of this toner and I think it is kinda therapeutic staring at the rose petals in the bottle. The toner has a faint rose fragrance to it that is very calming which I like and it is indeed very gentle on the skin. My skin feels very hydrated after using it and it does seem to tighten the pores as well. So far so good.

6) Fresh Vitamin Nectar Glow Juice Antioxidant Face Serum (15ml)


Yet another product from Fresh, for the month of September, I've also been loving this Vitamin Nectar Glow Juice Antioxidant Face Serum. It claims to be a juice serum that contains 480,000 nutrient rich microbubbles that delivers an essential dose of skin nutrition for an energised, healthy look and I'm loving it. The citrus scent is so refreshing and uplifting. It absorbs quickly and feels really light weight on the skin. I like to use it both in the day and night. For day time, I like to use it before applying makeup and it instantly brightens up my face without making it looks greasy. For my night time skin care routine, I like to use it before my moisturiser as it helps to prep my skin for the moisturiser allowing better absorption. I think the price tag of this serum is quite friendly, considering that Fresh is a rather pricey brand. It is retailing at $45 for a 15ml product and although 15ml seems a tad too little, but a little goes a very long way for it and I usually only needs 2 drops for my entire face. Pretty sure a small bottle of this can last me some decent amount of time.

7) Kiehl's Ultra Facial Oil Free Gel Cream


I've always been a fan for Kiehl's skincare products and I recently found another favourite from this brand and it is this Ultra Facial Oil Free Gel Cream. It is the most lightweight moisturiser I've ever used with its gelish texture and I like that it is mon greasy at oil and leaves my face shine free through the day. I also love that it can be absorbed very quickly and also with a cooling effect. It does kinda remind me of the liquid glue and it smells a little like the glue too just that it is not tacky at all. I like to use it in the day time before applying make up as the gel cream is able to keep me looking matte the entire day and since it is very lightweight, it acts as a good base for my makeup. This Ultra Facial Oil Free Gel Cream deserves to be raved about and I really truly love it too.

8) Pentaxyl cream


The last item on my September's favourite list is this Pentaxyl cream which I bought from my makeup instructor in August and I've been using it religiously for the past one month. So what is this cream all about? Pentaxyl is a proprietary blend of herbal extracts and the breakthrough formulas of the Matrixyl® Complex and Argireline, which reduce the appearance of wrinkles and furrows, help skin look thicker and firmer, and gives the skin a youthful glow. Pentaxyl has harnessed the age-fighting power of "bio-peptide" technology, with three age-fighting bio-peptides (1) Pamitoyl-Pentapeptide-3 (Matrixyl) (2) Palmitoyl Oligopeptide (3) Acetyl Hexapeptide-3 (Argireline). Peptides are a low molecular weight amino acid group that are building blocks of proteins that make up plants and animals. Palmitoyl_Pentapeptide-3 was discovered at National Institute of Health. So in short, this Pentaxyl cream helps to lighten any scarring that you have, including stretch marks. I have been using it on my face, to reduce the acne scars as well as firming the face. The result can be seen almost immediately and my face always look more lifted after applying this cream. It is very lightweight and absorbs really quickly so even if your skin type is oily like mine, it will not cause any greasiness hence this is a cream that in my opinion, suits every skin type. You can get this from https://sg.shop.com/Pentaxyl+reg+-1064446907-p+.xhtml#product-details and it is retailing at $123.25. Although it is slightly pricey, but it is definitely worth every penny in my opinion.

And that's all I have for my September's favourites. I hope you have enjoyed reading this post. Let me know what are some of your favourite products from September as well! Please follow me if you haven't already and I'll see you in my next post, xoxo.

Wednesday 2 October 2019

Orange Makeup Look With Colourpop's Orange You Glad! Eyeshadow Palette

Hey gorgeous,welcome back to my blog!

In today's post, I'll be doing a brand new series whereby I'll be sharing an eye makeup look in a specific colour theme. And to start off this brand new series, I am gonna do an orange theme eye makeup look with the Colourpop's Orange You Glad! (so punny huh) eyeshadow palette. So if you want to see how the makeup looks like, keep on reading!


If you are a fan of Colourpop like me, you should be very familiar with their coloured theme eyeshadow palettes and honestly I think they are all so affordable and adorable. Today I'll be sharing a makeup look with the Orange You Glad! Palette and let's take a look at the swatches first.


There are a total of 9 shades in this orange palette and all the colours in this palette scream vibrant and fun to me. My absolute favourite shade in this palette is sun-kissed because it is a very vibrant and bright orange shade and the pigmentation is really good. In fact, the pigmentation of all the shadows are very good with no fall outs as well. I love that the palette also comes with a big mirror which is good for travelling.


This is the completed eye look
For a start, I first applied "creamsicle" to the crease then followed by "sunkissed" to add definition to the crease.


Then, I went for "Mimosa Mami" and applied it to the outer and inner eye lid, blending it towards the centre. Without taking in more product, I used the remaining "Mimosa Mami" on the brush and applied it to my lower lash line, smudging it out with a flat brush.

And for the highlight of the look, I went for the glitter in the palette "clementine" and applied it to the centre of the lid, blending it up towards the crease. For better adherence of the glitter, you can either use a glitter glue or wet your brush before going into it.

Last but not least, I applied "ya peel me" to the upper lash line, smudging it out a little to create more definition as well as using it as an eyeliner. I then bring the extra product on the brush to the lower lash line, blending it well with the "Mimosa Mami". Then the makeup look is completed.


Overall I think this palette has got really vibrant and juicy vibe. The shadows are really pigmented with minimal fall outs, even for the glitter. Can't wait to try the other palettes from Colourpop next!

That's all I have for this post and I hope you like this brand new series. Please follow me if you haven't already and I'll see you in my next post, xoxo.